Coin Mech Help
There seems to be a whole lot of interest in putting coin mechs back into the games at this time. I know I am getting questions about them on a daily basis, so I thought it was time to add this little tid-bit to the Help Pages to save a few minutes in email. I've been getting Qs like... "What type of mechs do I need for a Galaga?".... "What should I use for mechs in a vertical mount coin door?".... "What holds the mechs to the coin door?"... I have coin mechs, but they are the wrong type for my door & I need to know which ones to get."... and a host of other Qs that seem to be related to simply mounting them back in the coin doors. I've taken a few pics of different types of mounting situations & I'll attempt to clear up some of the Qs without rambling too much.
The first thing to know is that most of the Qs above can be answered with one statement.... coin mechs are universal in design. We'd be in a real fix if they weren't. I can see the warehouses stacked to the ceiling with coin mechs at this stage of the game if they were all different :-( Hmmm.... the mech holders, as well, following that logic. I just had visions of a guy standing on the corner saying, "Psst... hey buddy, take a look at these rare Ms Pac coin mechs! What a deal I have for you! $100 will steal this pair from me today, & TODAY only!" :-)
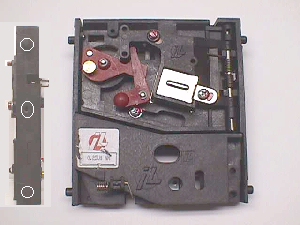
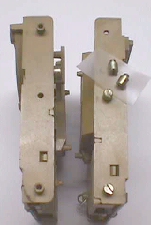
Just to clarify here before I get inundated with email, I'm speaking in general terms about the mechs as used in video arcade games. I don't want the first email saying... Hey, I took the mech out of my Rowe CD box & I can't get it to fit my Street Fighter II :-) Enough daydreaming... let's start off with a typical coin mech as pic'd below... a Happ, no less... and you can see that most ship with the 4 outer mounting studs in place. If you're doing a Ms Pac or other Midway of that vintage, these will pop right in without doing a thing to them.
The first thing newbies notice about the mech is that the 4 corner studs are made right onto the base. It appears that you have no option but to install them parallel to the door front (commonly referred to as horizontal mounting), but that simply isn't the case. They will mount in any type holder if you know how to install them. You can barely see the pattern on the side view, so I circled them... the 2 studs that seem to disappear all together, and the predrilled hole for a center stud. Incidently, this center hole, when a mech stud is installed, usually pairs with either the top or bottom stud for mounting in channel holders & you can leave the unused stud intact, i.e., it doesn't interfere with anything else, as it obviously would if you tried to mount it in a Midway with the center stud in place.
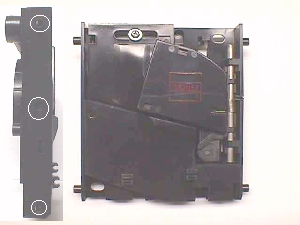
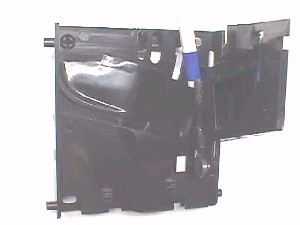
Before I get into how to make these fit, lets take a look at the Imonex below. You'll see it has the same mounting pattern on the base. There are a couple differences over the Happ mech with the first being that this type mech has no moving parts. On the right is a pic with the mech held open so that you can see the intricate maze that guides the coin toward the coin switch. Pretty poor pic, but the best of several that I took :-( The other difference is in the mounting studs, which are still made as part of the base, but on these they are hollow, as opposed to the solid ones on the Happ. It is somewhat of an advantage when you are trying to fit the mech to a different type of holder, as you'll see later on.... if I ever get to it :-) Rambling... rambling... rambling!
The pic below is of a couple old Coin Acceptor mechs that were setup in two different mounting apps. The one on the left was mounted in a perpendicular to the coin door front fashion (commonly referred to as vertically mounted) , while the one on the left was mounted in a channel holder similar to a Midway, but only half the size. The one on the left still has two of the plastic studs that are made as part of the base & the opposite side has had them cut off. The one on the right has had all four of the ready-made plastic studs cut off & four metal mech studs installed.
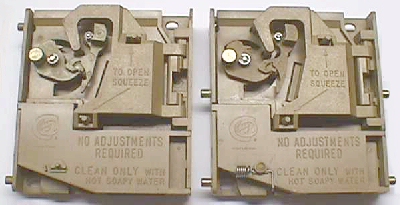
You can see above left that these mechs also had the hollow plastic studs. By now, you've probably caught on to the fact that these ready-made studs do not have to be used. If they are in the way, simply take a pair of flush cutters & snip them off. The advantage with the hollow studs that I spoke of, is that when you snip them off your hole is already in the base for you to screw on the metal mech studs where ever you need them.
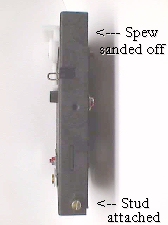
The pic below is of a Happ mech that I snipped one side's studs off from. On the top, I simply sanded it smooth & left it, but the bottom one I took a drill bit that fit into the center predrilled hole & used it to drill a hole where I had snipped off the ready-made stud. Now, if you look at the predrilled hole on any plastic mech, you'll see that they have it beveled to aid you in threading a stud into the plastic base... making it's own threads as it goes... so what I always do is take a pocket phillips screwdriver & twist it into the holes that I have drilled to bevel them in the same manner. It's always worked great for me, but you may want to take a larger drill bit & ream the top of the hole that way. I'm sure that you could do that just twisting the bit in your hand, as well... no drill power needed. The plastic is very easy to work with.
Let's look at a couple vertical apps. The type pic'd below is one whereby you have to snip off both ready-made plastic studs on the hinge side of the mech, but do nothing on the other side as it will drop right into the channels on the holder & then the swivel catch snaps down on the bottom stud locking the mech into place.
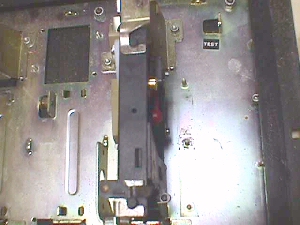
Then you have the solid hole holders & many have asked how to get the plastic studs through those holes :-( You know... do I bend the metal frame up to fit over the stud? No...... it's really a pretty simple solution.
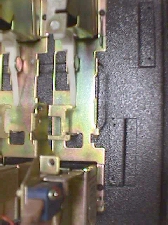
First you snip off both ready-made studs on the hinged side of the mech & sand it up a bit for a snug fit. Then snip off the remaing two studs & drill holes dead center of where the studs were removed, if they weren't the hollow ones, & slide the mech into place, fastening it with two Ľ" philips head screws as shown below.

See.... it's all pretty easy once you know the secrets :-)
Happy Gaming....